
There’s something deeply satisfying about turning a soft lump of clay into a finished sculpture. Your hands press, smooth, carve, and shape. Slowly, a simple form becomes a face, a figure, or a detailed miniature. But here’s the truth most beginners learn the hard way: choosing the right clay for clay modelling is only half the battle. Knowing how to use it properly is what truly separates hobbyists from skilled creators.
I’ve worked with everything from air-dry clay on a kitchen table to kiln-fired ceramics in a professional studio. And if there’s one thing I’ve learned, it’s this — technique matters more than talent. With the right approach, anyone can create clean edges, smooth surfaces, and durable pieces.
In this guide, I’ll share professional tips for using clay for clay modelling effectively. Whether you’re a beginner experimenting with sculpting clay or an experienced artist refining your craft, these insights will help you improve your results dramatically.
Understanding Different Types of Clay for Clay Modelling
Before you even begin shaping, you need to understand your material. Not all clay behaves the same way. Choosing the right clay for clay modelling depends on your project type, skill level, and tools available.
Air-Dry Clay
Air-dry clay is popular among beginners and hobbyists. It doesn’t require a kiln and hardens naturally at room temperature. It’s great for:
- DIY crafts
- School art projects
- Small figurines
- Decorative home décor
However, air-dry clay can crack if not handled carefully. Proper moisture control is essential.
Polymer Clay
Polymer clay is oven-bake clay. It stays soft until baked, which gives you unlimited working time. It’s ideal for:
- Miniatures
- Jewelry making
- Detailed figurines
- Doll accessories
Polymer clay offers excellent color options and smooth finishes.
Natural Clay (Ceramic Clay)
Traditional pottery clay requires kiln firing. It’s perfect for:
- Pottery
- Ceramic sculptures
- Functional items like mugs or bowls
It demands more skill but delivers professional, durable results.
Choosing the right clay for clay modelling from the start prevents frustration later.
Preparing Clay the Professional Way
Kneading and Conditioning
Always knead your clay before starting. This process, often called conditioning, removes air bubbles and improves flexibility. Air pockets are the main cause of cracks and explosions during baking or firing.
To knead properly:
- Press and fold repeatedly
- Roll into a log and twist
- Repeat for 3–5 minutes
Conditioned clay becomes smoother, warmer, and easier to shape.
Controlling Moisture
Clay that is too dry will crack. Clay that is too wet becomes sticky and loses structure. Professionals keep a spray bottle nearby to lightly mist natural clay when needed.
For air-dry clay, store unused portions in an airtight container or plastic wrap. Proper storage extends shelf life and maintains texture.
Essential Tools for Better Results
While hands are your primary tools, professional sculptors rely on additional equipment for precision.
Here’s a simple table of useful tools:
| Tool | Purpose |
|---|---|
| Sculpting tools | Carving fine details |
| Wire cutter | Cutting large clay blocks |
| Rolling pin | Flattening evenly |
| Needle tool | Creating texture lines |
| Loop tools | Hollowing and shaping |
| Silicone brushes | Smoothing surfaces |
| Armature wire | Internal support |
Using the right tools with clay for clay modelling ensures cleaner finishes and better structural integrity.
Use Armatures for Stability
Large or complex sculptures need internal support. This is where armatures come in. An armature is a framework made of wire, aluminum foil, or metal rods placed inside the sculpture.
Why use one?
- Prevents sagging
- Reduces cracking
- Saves clay material
- Adds strength
For human figures, build a simple wire skeleton before applying clay. It improves proportions and durability.
Mastering Basic Sculpting Techniques
Pinching Technique
Great for beginners. Use your fingers to shape small bowls or organic forms.
Coiling Method
Roll clay into long ropes and stack them to build forms. Smooth layers together for seamless surfaces.
Slab Building
Roll flat sheets and cut shapes. Ideal for boxes and geometric designs.
Each method works beautifully with clay for clay modelling when used correctly.
Avoiding Cracks and Breakage
Cracking is one of the biggest challenges artists face. Here’s how professionals prevent it:
- Maintain consistent thickness
- Avoid sudden drying
- Score and slip when joining pieces
- Dry slowly under plastic
Scoring involves scratching both surfaces before attaching them. Slip is a mixture of clay and water used like glue.
These small steps make a huge difference in the durability of your clay sculpture.
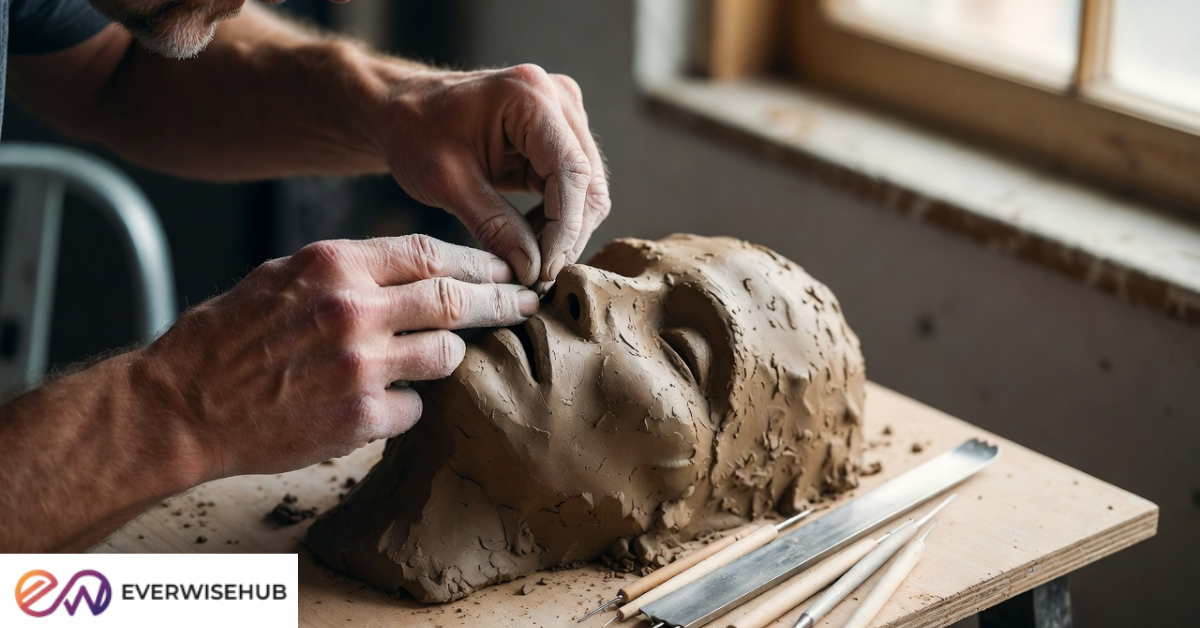
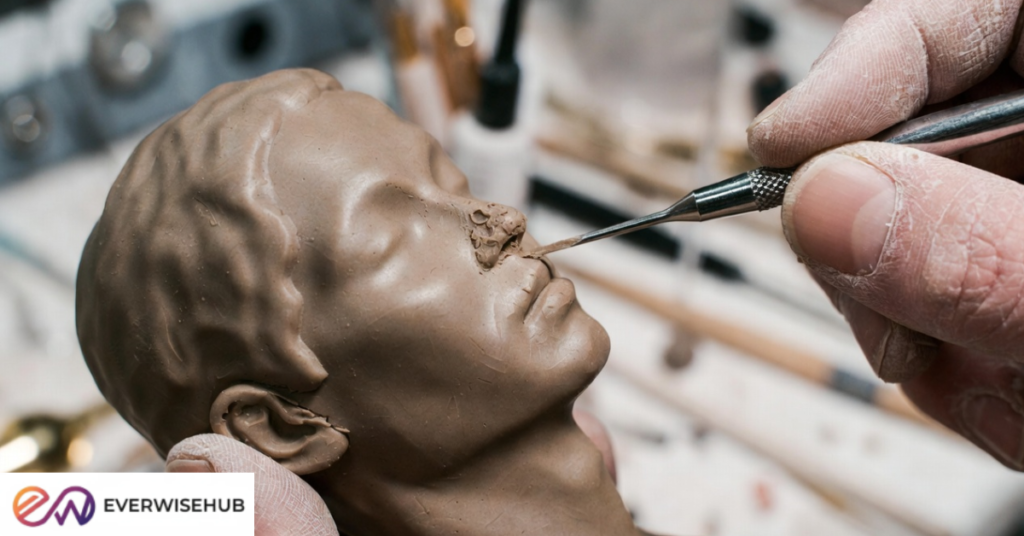
Detailing Like a Professional
Details bring life to your artwork. Whether sculpting facial features or textured surfaces, patience is key.
Tips for sharper details:
- Work from large shapes to small
- Use fine needle tools
- Let clay firm up slightly before carving
- Keep reference images nearby
For realistic sculpting, focus on anatomy basics, symmetry, and proportion. Practice improves hand control over time.
Smoothing and Finishing Techniques
Professional-looking pieces always have smooth surfaces.
For Air-Dry and Natural Clay
- Use a damp sponge
- Blend seams gently
- Avoid over-wetting
For Polymer Clay
- Use rubbing alcohol lightly
- Sand after baking with fine sandpaper
- Buff for shine
Finishing is where clay for clay modelling truly transforms from handmade to high-quality art.
Drying and Curing Correctly
Improper drying ruins good work.
Air-Dry Clay
Let it dry naturally in a ventilated area. Rotate occasionally for even drying. Avoid direct sunlight.
Polymer Clay
Follow exact baking temperature instructions. Use an oven thermometer to prevent burning.
Ceramic Clay
Allow pieces to fully dry before kiln firing. Bisque firing strengthens the piece before glazing.
Rushing this stage often causes cracks or warping.
Painting and Sealing
Once your clay for clay modelling piece is dry or cured, you can enhance it further.
Best paint types:
- Acrylic paint
- Water-based paints
- Metallic finishes
After painting, seal with:
- Clear varnish
- Matte sealant
- Gloss top coat
Sealing protects your work from moisture and scratches.
Common Mistakes Beginners Make
Even talented beginners fall into these traps:
- Skipping conditioning
- Ignoring thickness consistency
- Overworking the clay
- Using too much water
- Not planning structure
Awareness helps you avoid them.
Storage Tips for Long-Term Success
Proper storage keeps your clay fresh.
- Wrap tightly in plastic wrap
- Store in zip-lock bags
- Keep in cool environments
- Label clay types clearly
Different types of clay for clay modelling require different storage conditions, especially polymer and natural clay.
Advanced Techniques for Experienced Artists
Once you master basics, explore advanced sculpting skills:
Texturing
Use sponges, fabric, leaves, or stamps to create realistic surfaces.
Hollow Sculptures
Reduce weight and prevent cracking by hollowing larger pieces.
Mixed Media
Combine clay with wood, resin, or metal for creative designs.
Glazing and Firing
For ceramics, experiment with glaze layering techniques to achieve unique finishes.
Advanced control comes from repetition and experimentation.
Maintaining Clean Work Habits
Professional artists maintain clean workspaces. Dust and debris can ruin smooth surfaces.
Keep these habits:
- Clean tools regularly
- Wash hands before switching clay types
- Cover work in progress
- Keep reference sketches nearby
Clean habits improve consistency in clay for clay modelling projects.
Why Practice Matters More Than Talent
Many beginners think they lack artistic ability. That’s rarely true. Skill with clay develops through repetition. The more you sculpt, the better your muscle memory becomes.
Start small. Create simple shapes. Study proportions. Analyze mistakes. Over time, your control, precision, and confidence will improve naturally.
Every professional once struggled with cracked bowls and uneven faces. Growth happens gradually.
Frequently Asked Questions
What is the best clay for beginners?
Air-dry clay is usually best for beginners because it requires no special equipment.
How do I stop clay from sticking?
Lightly dust hands with cornstarch for polymer clay. Use minimal water for natural clay.
How thick should clay be?
Maintain even thickness throughout the piece, usually around ¼ inch for small sculptures.
Can I reuse leftover clay?
Yes, if it hasn’t dried or been baked. Proper storage is essential.
Final Thoughts on Mastering Clay for Clay Modelling
Working with clay is both relaxing and challenging. It teaches patience, focus, and creativity. The key to mastering clay for clay modelling is understanding your material, preparing it correctly, and applying professional techniques consistently.
From conditioning and armatures to smoothing and sealing, each step matters. Small improvements lead to noticeable results. And most importantly, don’t rush the process. Good sculpting takes time.